Make an existing Hugo theme compatible with Netlify CMS

Netlify CMS
Think of a landing page.
There are cases where engineers create the site, but the drafts and images are created by marketing.
I want to make minor corrections and replace images, but I feel uncomfortable asking an engineer every time…
With Netlify CMS , you can perform CMS functions like WordPress such as Hugo’s text editing, image management, posting functions, etc. from the web UI to generate static sites.
1.Configure OAuth with Netlify
Follow the Netlify documentation to set it up.
OAuth provider setup
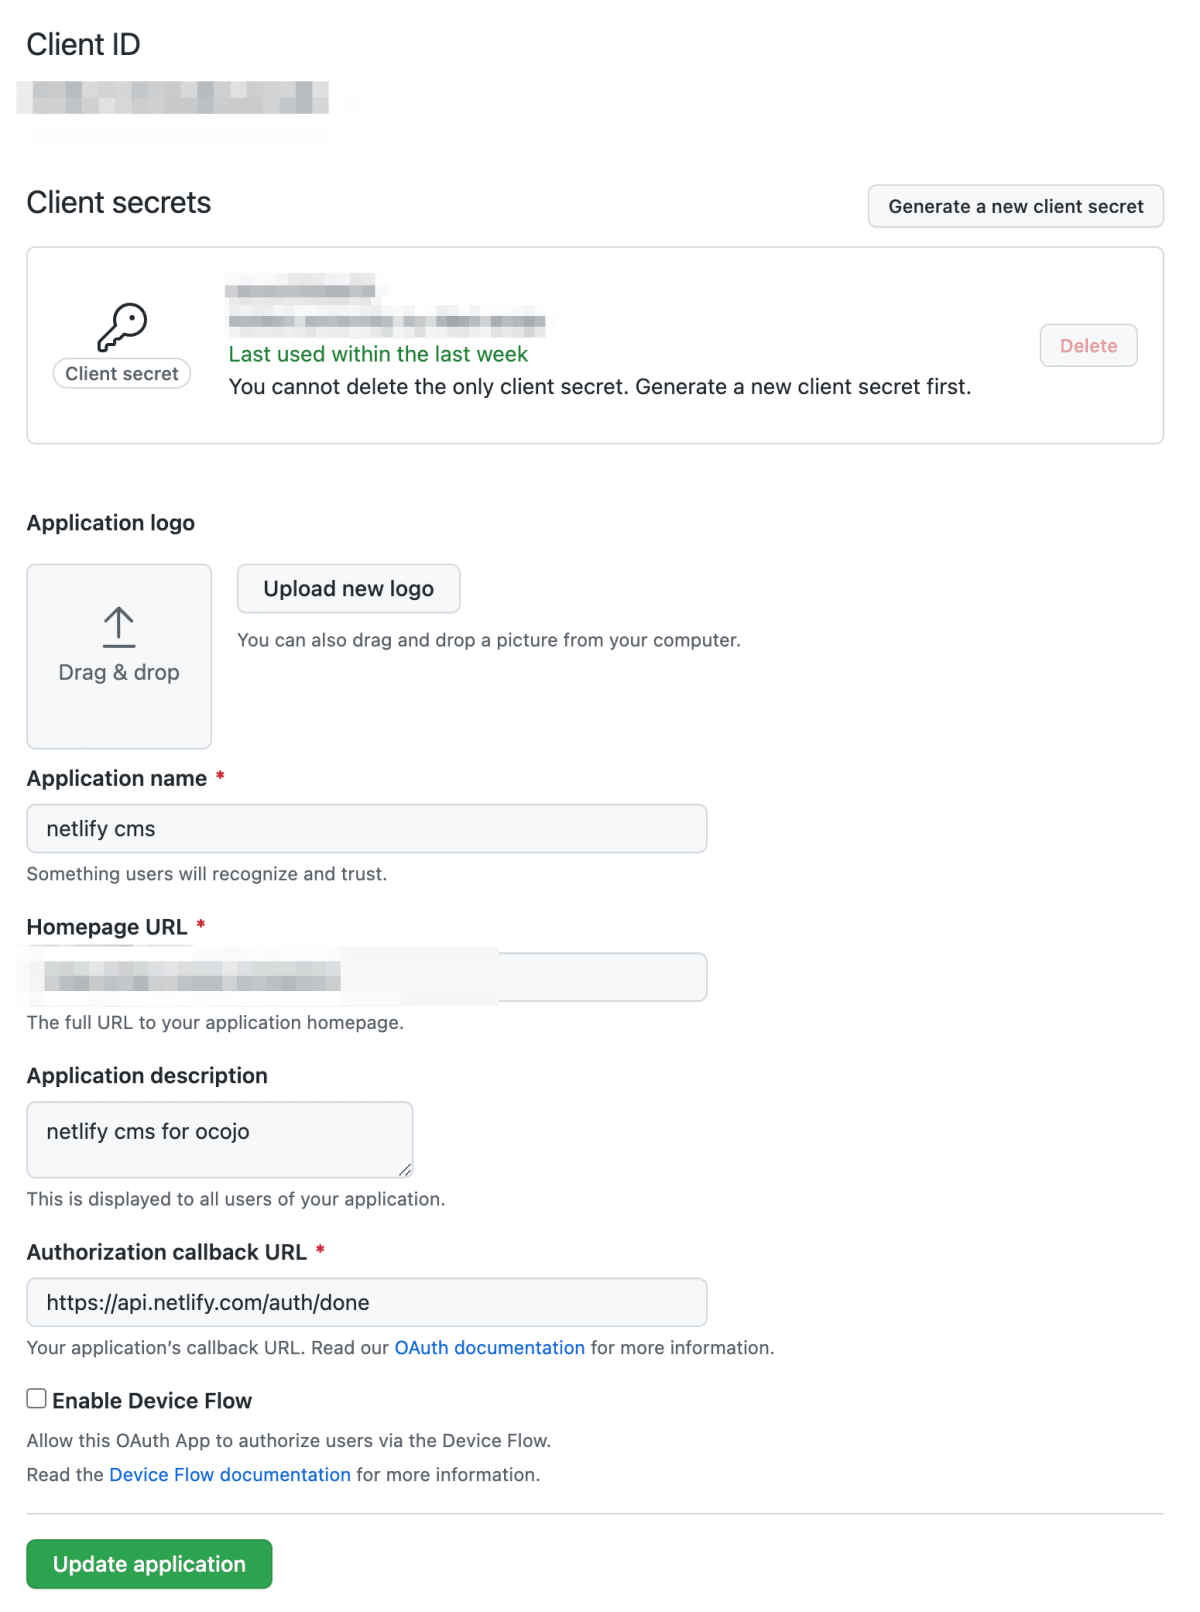
First , create OAuth Apps on the GitHub side Client IDand Client secretsget them.Authorization callback URLseems https://api.netlify.com/auth/doneto set
Netlify UI settings
From the Netlify page and Site settings > Access control > OAuthproceed Install Providerto register as before.Client IDClient secrets

Preparations are now complete.
2.Using Netlify CMS from Hugo
First , create a directory as per the document and copy and paste the following into it .static/adminindex.html
static/admin/index.html
<!-- index.html -->

<!DOCTYPE html>
<html>
  <head>
    <meta charset="utf-8" />
    <meta name="viewport" content="width=device-width, initial-scale=1.0" />
    <title>Content Manager</title>
    <!-- Include the script that enables Netlify Identity on this page. -->
    <script src="https://identity.netlify.com/v1/netlify-identity-widget.js"></script>
  </head>
  <body>
    <!-- Include the script that builds the page and powers Netlify CMS -->
    <script src="https://unpkg.com/netlify-cms@^2.0.0/dist/netlify-cms.js"></script>
  </body>
</html>
Set here to what you want to set from the WebUI . is the so-called Front Matter item in Hugo’s markdown file セクションのプロパティconfig.yml
If you want to set, set as follows.
static/admin/config.yml
backend:
  name: git-gateway
  branch: master # Branch to update (optional; defaults to master)
media_folder: static/img
public_folder: /img
collections:
  - name: "blog" # Used in routes, e.g., /admin/collections/blog
    label: "Blog" # Used in the UI
    folder: "content/post"
    create: true
    slug: "{{slug}}"
    editor:
      preview: true
    fields: # The fields for each document, usually in front matter
      - {label: "Layout", name: "layout", widget: "hidden", default: "blog"}
      - {label: "Title", name: "title", widget: "string"}
      - {label: "Publish Date", name: "date", widget: "datetime"}
      - {label: "Featured Image", name: "thumbnail", widget: "image", required: false }
      - {label: "Categories", name: "categories", widget: "string", required: false }
      - {label: "Tags", name: "tags", widget: "string", required: false }
      - {label: "Description", name: "description", widget: "string" }
      - {label: "Body", name: "body", widget: "markdown"}
If you deploy to Netlify with this file included https://<your domain>/adminand access it, you can set the items to write from the WebUI as follows.
After deploying, go to https://<your domain>/admin/ and you will see a button called Login with Netlify Identity . However, when I try to log in, I get the error message Unable to access identity settings. When using git-gateway backend make sure to enable Identity service and Git Gateway . This error message will be resolved in the next chapter.
3. Change settings
Change Netlify settings. First, go to Site settings → Identity and click Enable Identity .

Then go to Site settings → Identity → Services → Git Gateway and click Enable Git Gateway .

4. Operation check
After completing the above settings, access https://xxx.netlify.app/admin/ and click Login with Netlify Identity to display the Sign up and Log in modals . Enter your name, email address and password to create an account for Netlify CMS. Note that Netlify and Netlify CMS are different, so you cannot log in even if you enter your Netlify account information.

I think that https://xxx.netlify.app/#confirmation_token=xxx is described in the confirmation email . However, even if I hit the URL described in the email, the authentication is not completed. You need to go to https://xxx.netlify.app/admin/#confirmation_token=xxx to complete the verification . After completing authentication , access https://xxx.netlify.app/admin/ and log in to display the following administration screen.

5. Enhanced security
Up to this point, we have made the existing Hugo theme (Ananke) compatible with Netlify CMS. However, with the current settings, anyone can sign up, which is not desirable from a security perspective. So set the Site settings → Identity → Registration → Registration preferences setting to Invite only . This setting hides the Sign up modal.

6. Conclusion
So far, we have described the steps to make an existing Hugo theme compatible with Netlify CMS. In this article, I used the config.yml from the Platform Guides Hugo with most of the defaults and states. It is highly customizable. See Configuration Options for details.